
Why?
In my last post, I walked through how to configure your Azure blob and CDN to serve your static website. The deployment script outlined in that post is fine for a simple blog site. However, it is not a solution if you have a site that is contributed by multiple people. Everytime anyone pushes, they would get a merge conflict on the generated content, or they can force push and risk losing other changes.
It is generally best practice to delegate the build/deploy steps after a push to a remote repo, in our case it’s Github. Travis CI lets you build and deploy all Open Source software for free. So we will utilize Travis to build your Hugo site on every push to Github.
After this post, you will have a Hugo blog that will continuously integrate with your Azure Blob and CDN deployment, without you worrying about building or deploying the site yourself.
Pre-requisites for this post:
- Have an Azure Account
- Have a blob storage
- Set up a CDN profile and endpoint
- Have a travis-ci.org
- Have a github repo
Please refer to the previous post if you need help setting up the CDN and Blob Storage. This post will walk through how to set up continous integration with TravisCI.
1. Make sure your hugo repo is clean to build
By default, Hugo generates a directory called public. If we want Travis to build this directory for us, we need to remove the public directory from source control.
rm -rf publicgit add .git commit -m "removed public"git push- add
public/to your.gitignorefile.
Make sure your themes directory is also not in your repo. This ensure that on every build, your theme is up to date. If you choose to include the theme in your repo, then you’ll need to modify the .travis.yml file (in the post later) a bit.
2. Install Azure CLI
Download and install the lastest version of Azure Cli.
Login with Azure CLI with az login, and follow the prompt.
3. Create an Azure Service Principal
An azure service principal allows you to granularly control who has control over your specific Azure resources. In other words, service principal lets other apps operate certain things on your azure account without you giving them your Azure password. Security FTW!
To create a service princpal:az ad sp create-for-rbac --name {appName} --password "{strong password}"
Note: appName can be anything, and make sure you type a STRONG password.
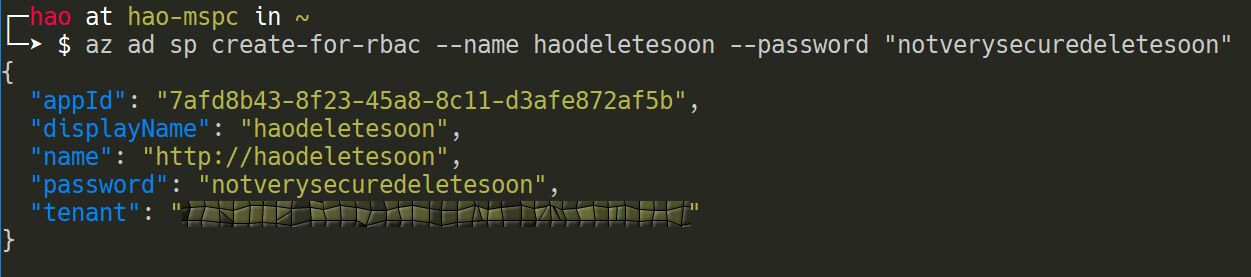
You will get back a json object. Copy that json object somewhere secure, and we will use much of this information when we are integrating with Travis. Specifically: appId, password, and tenantId
4. Configure your Service Principal for CDN
By default, the service principal sets a contributor role to your subscription. We don’t want to give Travis that much power.
We only want the service principal the ability to operate on our CDN profile for purging.
First Remove the service principal from your subscription. Go to your Subscription by either searching your subscription name or look for it in the Subscriptions blade. Then navigate to the subscription in which you created your Service Principal, and click on “Access Control”.
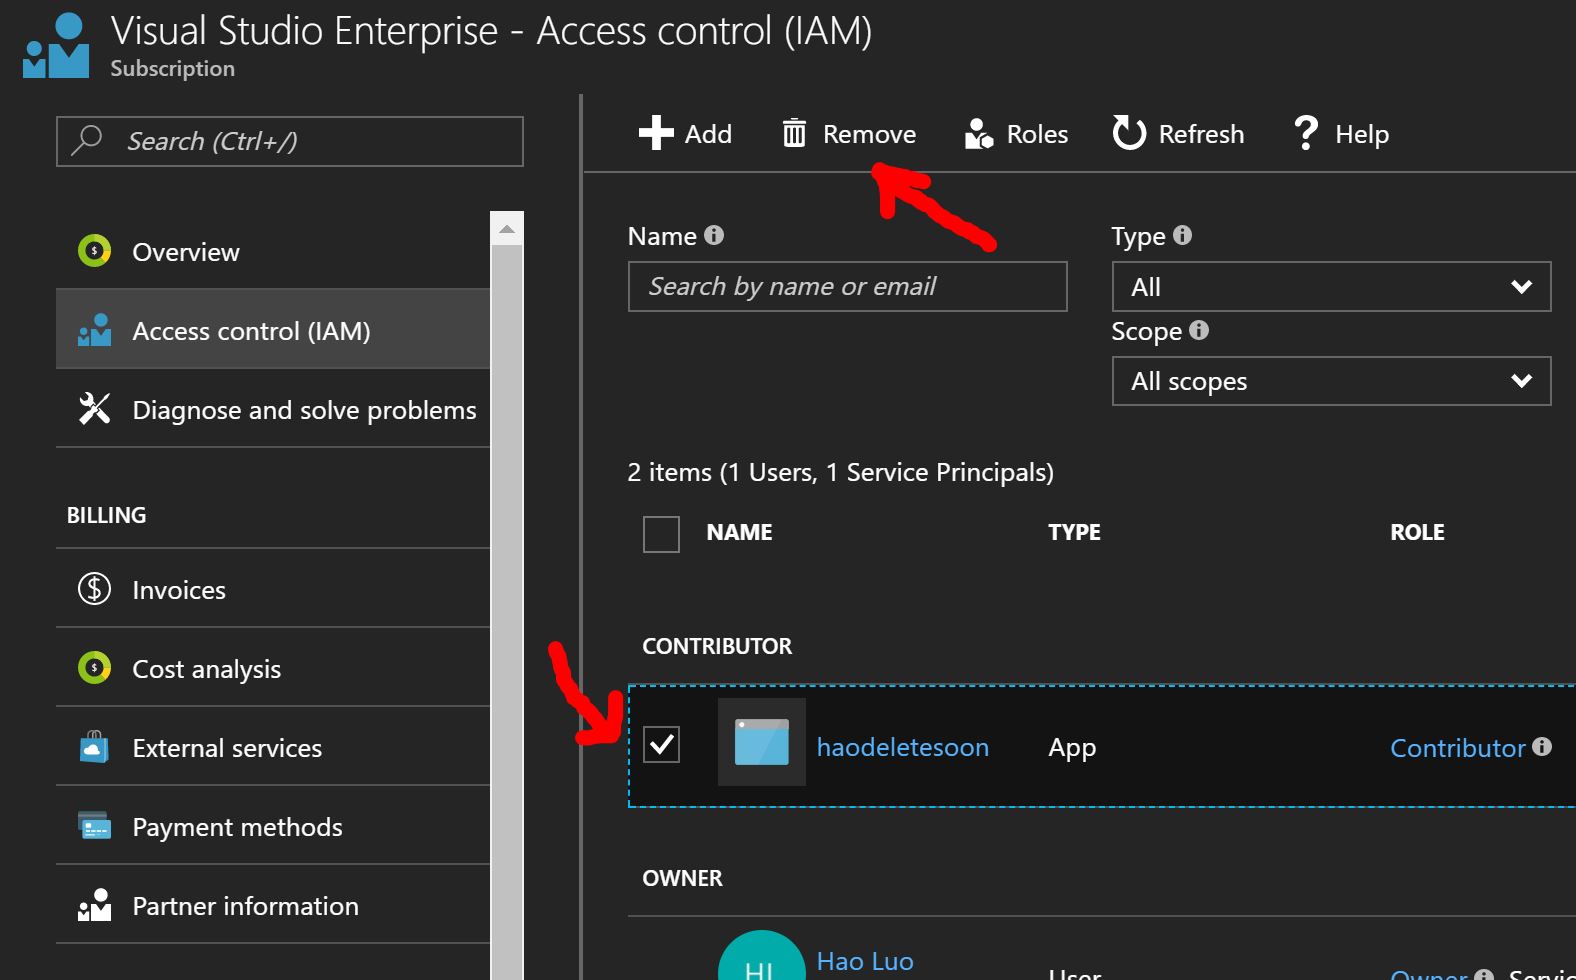
Select the service principal, and click “Remove”.
Now, you can navigate to your CDN Profile resource, and go to its Access Control blade. Then, search for your service principal by clicking “Add” button. See screenshot below.
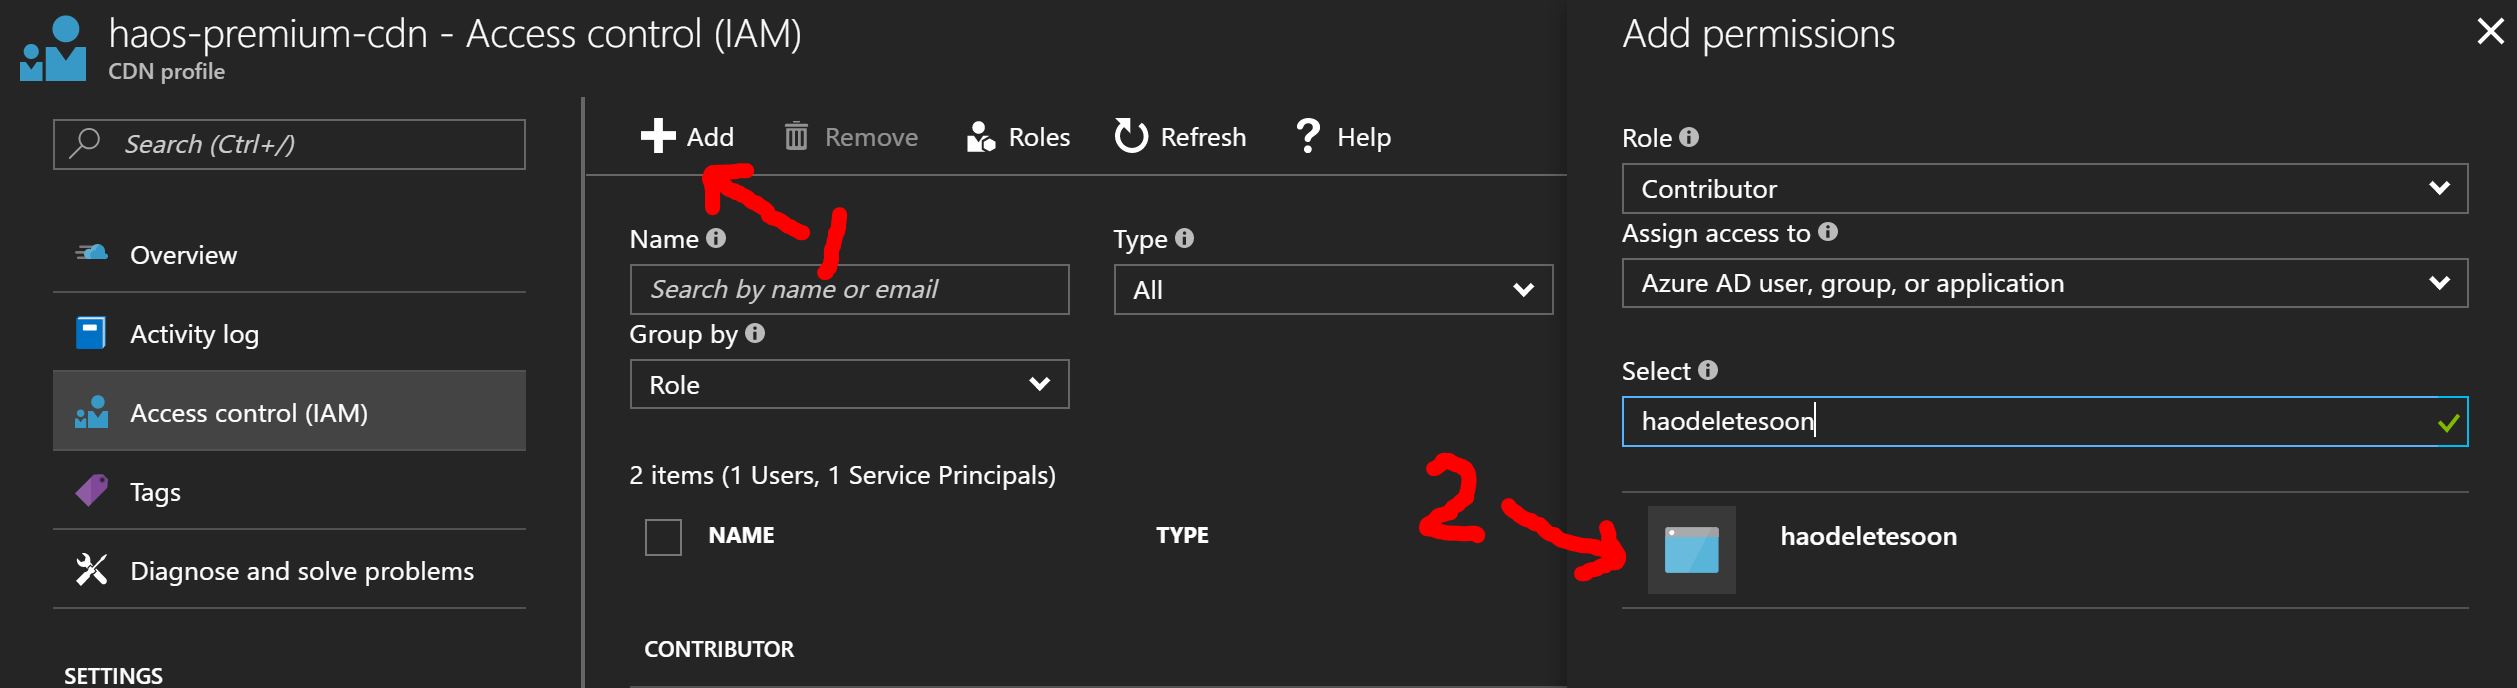
You are now done with the Azure portion of the setup.
5. Set up your Travis Environment Variables
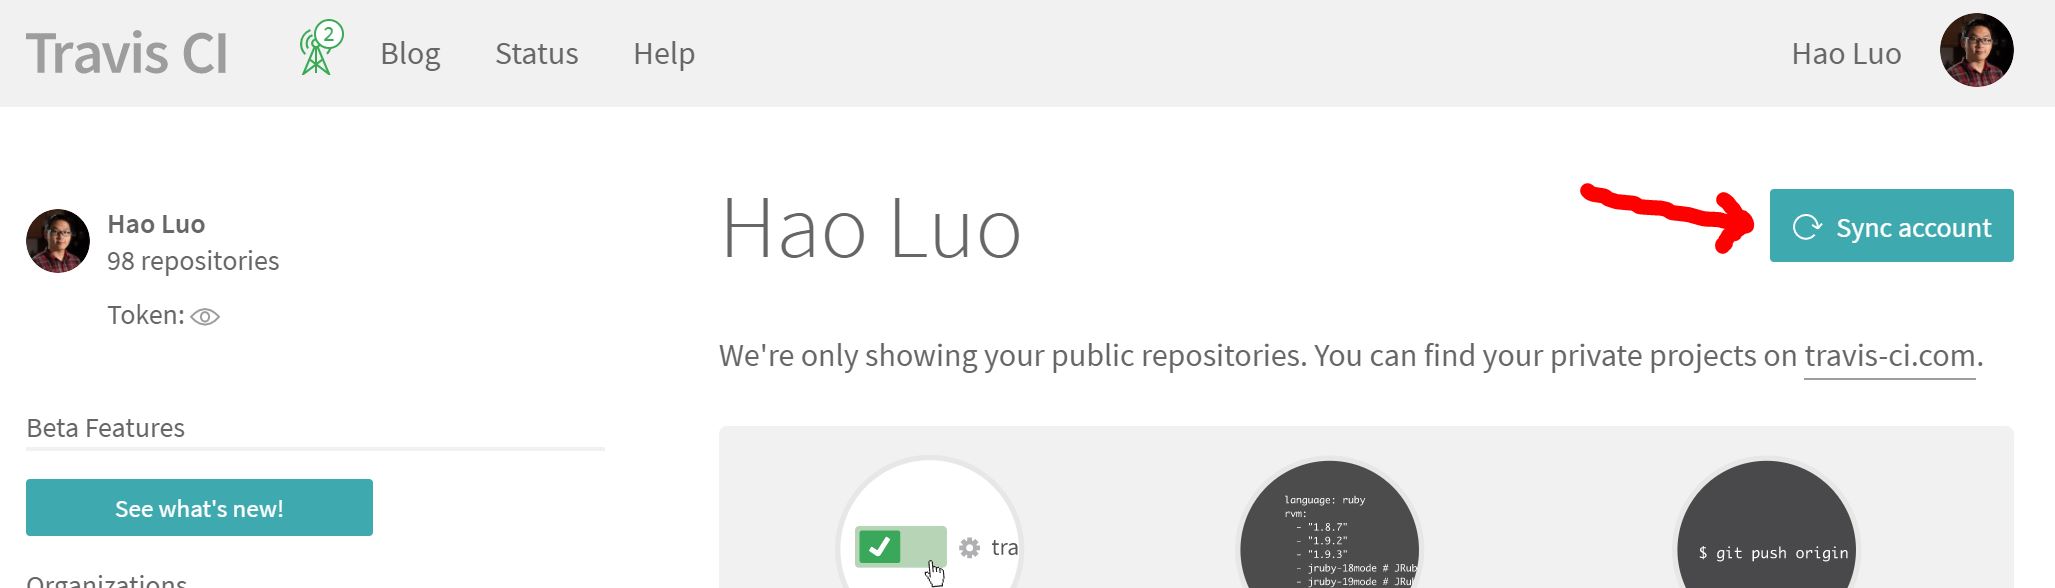
Assuming you already have the repo on github, login into travis-ci.org, and go to your account. You should see a list of your public repositories. If you do not, click “Sync Account” on the upper right of the screen.
Note: Make sure you are on travis-ci**.org** and NOT on travis-ci**.com**
Find the repo you want to deploy, and click the toggle. wait until it turns green, and then click into the repository.
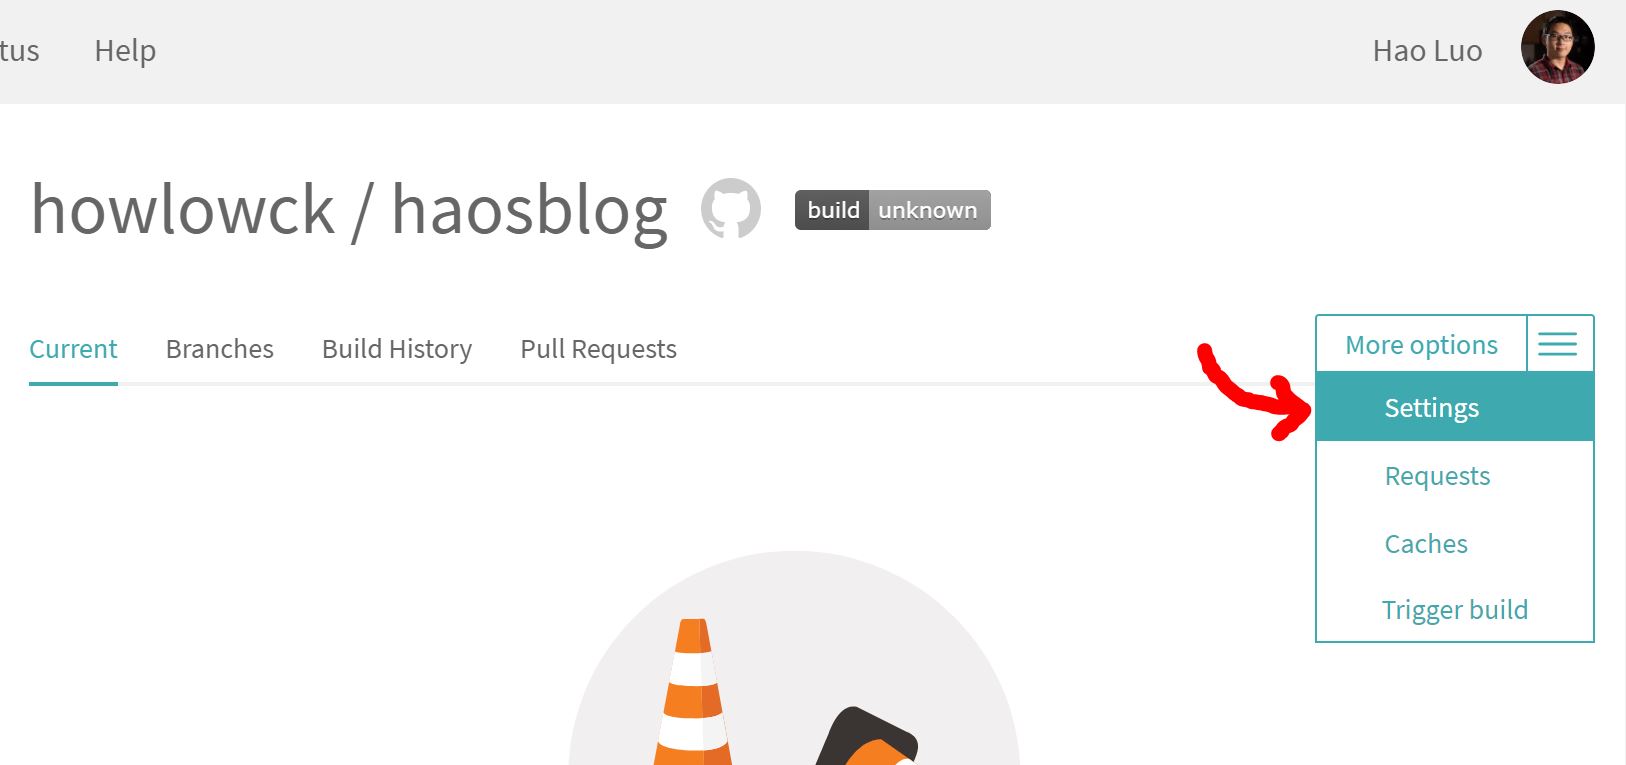
When you are in the repository on Travis, click Settings.
Scroll to “Environment Variables” and put the following environment variables:
AZURE_SERVICE_PRINCIPAL_APP_ID- theappIdfrom the json object when you created the service principalAZURE_SERVICE_PRINCIPAL_APP_PASSWORD- thepasswordfrom the json objectAZURE_SERVICE_PRINCIPAL_TENANT- thetenantIdfrom that json objectAZURE_STORAGE_ACCESS_KEY- the access Key for the storage account to upload your filesAZURE_STORAGE_ACCOUNT- the name of the storage accountBLOBSTORAGE_CONTAINER_NAME- the container for which you want to upload to
6. Add your Travis file
Here is the .travis.yml file to add to your repo:
dist: wheezy
sudo: off
addons:
  apt:
    packages:
      - python-dev

language: go

git:
  depth: 10

branches:
  only:
    - master

env:
  global:
    - SOURCE_DIR="public"
    - DESTINATION_PATH="https://haosblob.blob.core.windows.net/public/"
    - CDN_RESOURCE_GROUP="haosblog-rg"
    - CDN_ENDPOINT_NAME="haosblog"
    - CDN_PROFILE="haos-premium-cdn"

install:
  - go get -u -v github.com/spf13/hugo
  - echo "deb [arch=amd64] https://packages.microsoft.com/repos/azure-cli/ wheezy main" | sudo tee /etc/apt/sources.list.d/azure-cli.list
  - sudo apt-key adv --keyserver packages.microsoft.com --recv-keys 417A0893
  - sudo sh -c 'echo "deb [arch=amd64] https://apt-mo.trafficmanager.net/repos/dotnet-release/ trusty main" > /etc/apt/sources.list.d/dotnetdev.list'
  - sudo apt-key adv --keyserver hkp://keyserver.ubuntu.com:80 --recv-keys 417A0893
  - curl https://packages.microsoft.com/config/ubuntu/14.04/prod.list > ./microsoft-prod.list
  - sudo cp ./microsoft-prod.list /etc/apt/sources.list.d/
  - curl https://packages.microsoft.com/keys/microsoft.asc | gpg --dearmor > microsoft.gpg
  - sudo cp ./microsoft.gpg /etc/apt/trusted.gpg.d/
  - sudo apt-get update
  - sudo apt-get install apt-transport-https azcopy azure-cli

# Build the website
script:
  - mkdir themes
  - git clone https://github.com/digitalcraftsman/hugo-icarus-theme.git themes/hugo-icarus-theme
  - hugo
  - azcopy --source $SOURCE_DIR --destination $DESTINATION_PATH --dest-key $AZURE_STORAGE_ACCESS_KEY --recursive --quiet --set-content-type
  - az login --service-principal -u $AZURE_SERVICE_PRINCIPAL_APP_ID --password $AZURE_SERVICE_PRINCIPAL_APP_PASSWORD --tenant $AZURE_SERVICE_PRINCIPAL_TENANT
  - az cdn endpoint purge -g $CDN_RESOURCE_GROUP -n $CDN_ENDPOINT_NAME --profile-name $CDN_PROFILE --content-paths "/*"
You will need to change some configurations. under env > global, set the variables according to your azure account:
And if you choose to pull down the latest version of your hugo theme, make sure to change the theme repo link under script, and also the directory name accordingly.
This Travis script is doing several things:
- Creates a themes directory and pull your theme down from Github
- Builds the site with hugo
- Uploads all the generated files to Blob Storage using
azcopy - Purges your CDN endpoint using
azclient
7. Push you changes
Once you have added your .travis.yml file to your repo. Just add it and push it to Github. After a few seconds, you can go to Travis, and watch your blog build.
Now every time you make a change to your site, even through the Github web app, your website will be updated.
Please let me know in the comments below if there is a better way to deploy with Travis or speed up the build process.