Replacing Docker with Podman for VSCode DevContainers
This is a walkthrough of how to replace Docker with Podman, and configure VSCode to use its VSCode DevContainer for both single and multiple-container scenarios.
While this walkthrough is targeted for Windows WSL2 environment, it theoretically would work with other platforms (such as Linux and Intel Mac)
1. Installing Podman
Remove Docker Desktop
Install Podman: https://www.redhat.com/sysadmin/podman-windows-wsl2
. /etc/os-release

sudo sh -c "echo 'deb http://download.opensuse.org/repositories/devel:/kubic:/libcontainers:/stable/x${NAME}_${VERSION_ID}/ /' > /etc/apt/sources.list.d/devel:kubic:libcontainers:stable.list"

wget -nv https://download.opensuse.org/repositories/devel:kubic:libcontainers:stable/x${NAME}_${VERSION_ID}/Release.key -O Release.key

sudo apt-key add - < Release.key
sudo apt-get update -qq

sudo apt-get -qq -y install podman

sudo mkdir -p /etc/containers

echo -e "[registries.search]\nregistries = ['docker.io']" | sudo tee /etc/containers/registries.conf
Note: the script above is the same as in the linked blog post above, except for the last command where we removed the
quay.ioregistry entry. This is because during container creation, podman will open stdin to ask the user to select the registry if the same container name exists on multiple registries, VSCode won’t open the stdin for you so the process just hangs.Follow the link above to configure WSL2-specific instructions.
podman infoto make sure everything looks goodAdd
alias docker="podman"to your dotfile (ie..bash_profileor.zshrc, etc) for convenience and back-compatibility
2. Configuring VSCode DevContainer
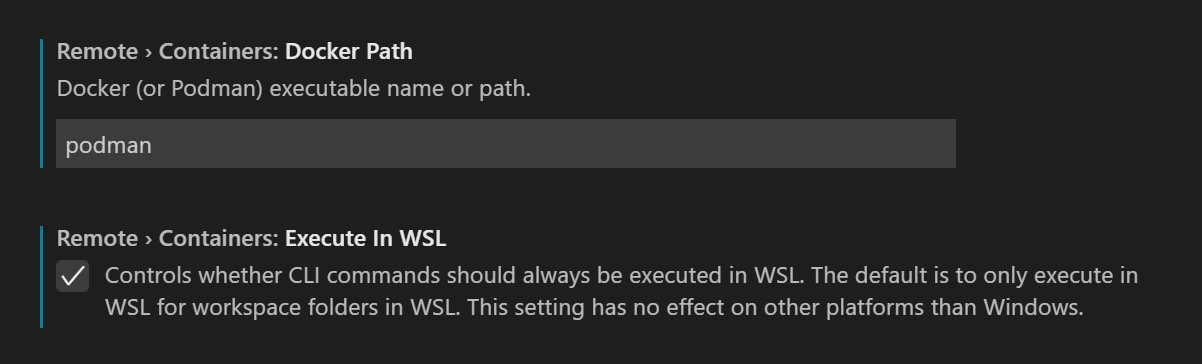
Make sure you have the following settings:
Find a non-docker-compose
.devcontainerproject, and make sure it starts up and works properly.
Troubleshooting Podman DevContainer
mkdir: cannot create directory '/root': Permission denied- If you configured podman to be rootful and would like to run the devcontainer with root, then you can remove/comment out
remoteUserindevcontainer.json. - If you want the devcontainer to be rootless, and you encountered the error above, add the following two values into your
.devcontainer/devcontainer.json:
"runArgs": ["--userns=keep-id"], "containerUser": "vscode", // the value needs to match the value of "remoteUser"- If you configured podman to be rootful and would like to run the devcontainer with root, then you can remove/comment out
3. Install Podman-Compose and configure VSCode
- Make sure you have
pip3installed. - Right now, there are some commands missing in
podman-composefor VSCode Devcontainer to work. There is a PR out to address this. (UPDATE: It’s merged.) For now, you can runpip3 install https://github.com/containers/podman-compose/archive/devel.tar.gzin install the dev version. Once it’s merged intostable, You can simply runpip3 install podman-composeto update. - (Optional) You can add
alias docker-compose="docker-compose"in your dotfile, but there might be some back-compat issues with docker-compose, plenty of missing commands. - Update VSCode settings like so:

Caveat
- Podman needs the containers to be rootful for networking to work, so we need to comment out
remoteUserindevcontainer.jsonif it’s specified.
Troubleshooting Podman-Compose
Error: error creating container storage: the container name "(name)" is already in useKill the containers by listing out the running container (
docker ps) and killing them (docker kill ...<container ids>)